Papastew.co.uk - Title Banner

Fort Condor

Final Fantasy VII - Fort Condor

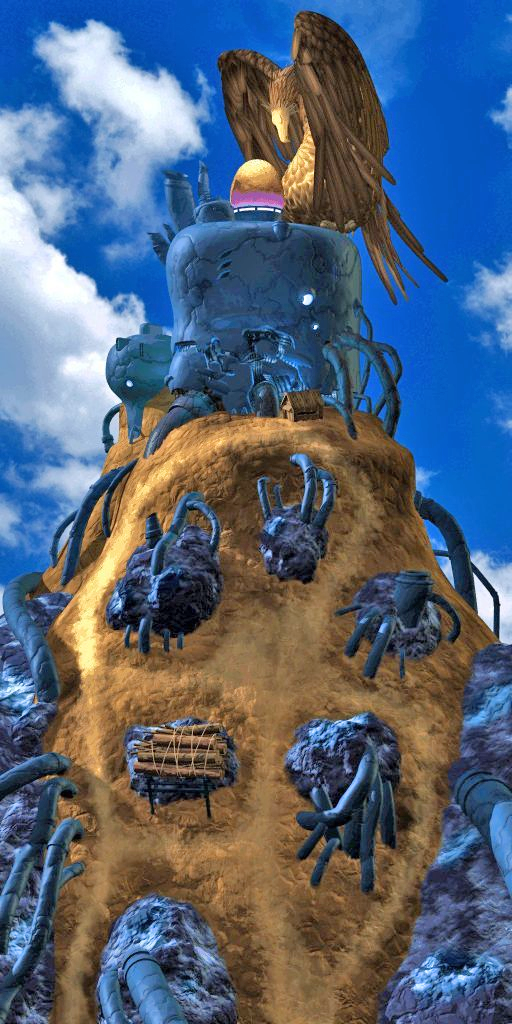
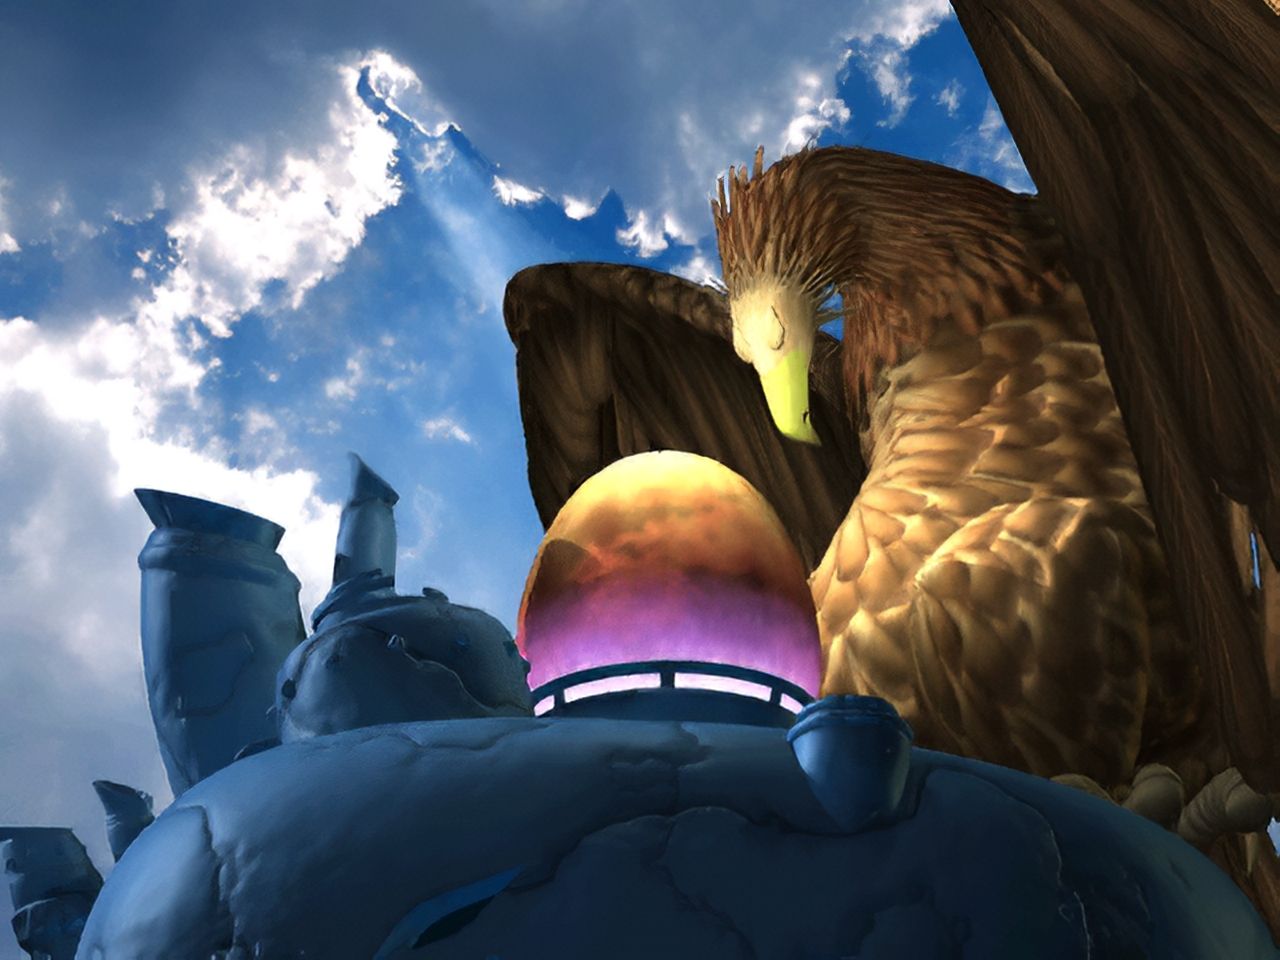
Throughout the game, you can visit Fort Condor to engage in some battles; but not in the way we are used to.


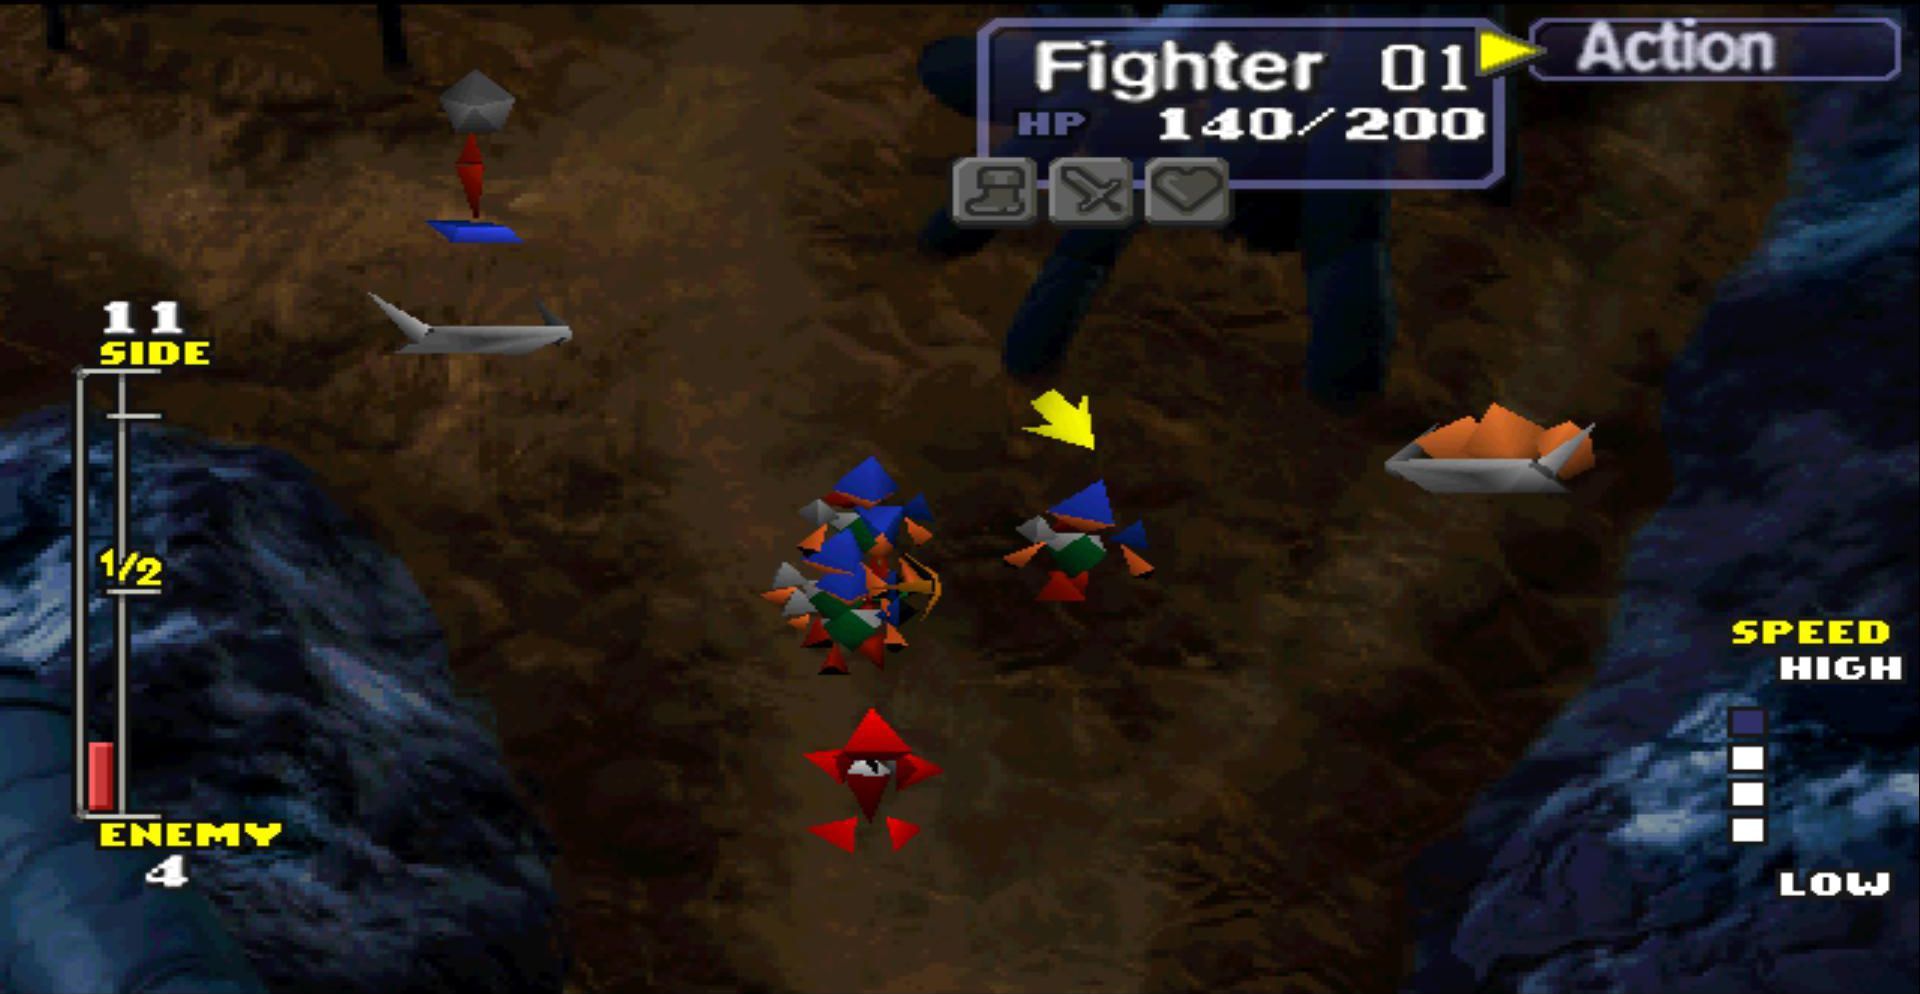
These battles are more real-time strategy where you place units on the side of the hill and your goal is to prevent the enemy from reaching the top.


To do this, you must place units on the hill that you can command to move and attack the enmy or set up as a defence.


There are 21 battles in total; including the story one to obtain the Huge Materia but there are some that cannot be fought as they occur during events that cannot be skipped in the story.


Mechanics

The battles are fought on the side of Fort Condor; the enemy comes from the bottom in to locations and the path splits, giving the enemy several routes to the top.


Their goal is to reach the top where the old reactor is and your goal is to hire soldiers to fight them off.

The soldiers are paid for by you, with your hard earned Gil... but there are rewards.

Ally Units

These units are all purchasable with the excption of the Worker Bomb, which is constructed by the Workers, and can be placed on the battle map. Each has a strength and a weakness where they deal more damage to some units and less to others; all units have a range where they can attack or repair.

Unit Name Cost HP Attack Range Speed Vs Beast Vs Wyvern Vs Barbarian Vs Commander
Attacker 420 Gil 180 25 1 234 160% 90% 70% 50%
Catapult 480 Gil 100 18 1-5 200 100% 80% 80% 50%
Defender 440 Gil 220 35 1 208 100% 70% 150% 50%
Fighter 400 Gil 200 30 1 224 100% 90% 100% 50%
Fire Catapult 600 Gil 120 25 1-6 190 100% 80% 80% 50%
Repairer 480 Gil 160 10 1 212 100% 100% 90% 50%
Shooter 520 Gil 160 10 1 212 100% 90% 100% 30%
Stoner 480 Gil 100 20 1-4 188 100% 30% 80% 50%
Tristoner 1000 Gil 150 30 1-5 178 100% 30% 80% 50%
Worker 400 Gil 160 15 1 230 100% 90% 100% 50%
Worker Bomb - - 15 1-4 173 100% 85% 100% 50%

Enemy Units

These units belong to Shinra and come in waves; starting from the base of the mountain and working their way up. Each has a strength and weakness; vulnerable to some units and resistant to others.


The PS1 and PC versions have different HP for the units (below it will show it as PS1/PC).

Unit Name HP Attack Range Speed x 1.5 Damage x 0.5 Damage
Barbarian 180 15/20 1-3 207 Attacker Defender
Beast 230 25/30 1 199 Shooter Attacker
Commander 250 50/60 1 207 - -
Wyvern 190 20/25 1 229 Defender Shooter

Unit Balance

Unit Name Strong Against Weak Against
Attacker Beast Barbarian
Defender Barbarian Wyvern
Shooter Wyvern Beast

Attacker

The Attacker is a fast unit with good attack strength and HP. It is strong against the Beast but is vulnerable to the Barbarian.

Catapult

A stationary unit that fires a stone far which then rolls. Has low HP and attack strength but is a cheap ranged weapon.

Defender

The Defender is a tank unit with high HP, the best attack strength and is strong against the Barbarian but is slow and weak against the Wyvern.

Fighter

The fighter is an all-rounder. Good HP, Attack and speed combined with no weakness to specific enemies. Cheapest attack unit.

Fire Catapult

A stationary unit that launches a bomb far away where it detonates on impact. Low HP and expensive, it is useful as a backup behind the other units.

Repairer

A utility unit that can repair and heal other units. Has low HP and attack, it should be kept away from battle until needed, but is very slow.

Shooter

Ranged attacker that moves slowly but can deal damage from a distance. Strong against the Wyvern but is weak to the Beast.

Stoner

A Stationary unti that rolls a stone in a narrow area but has good range and damage. Not very effective against the Wyvern and has low HP.

Tristoner

A Stationary unti that rolls 3 stones in a narrow area but has good range and damage. Not very effective against the Wyvern, has low HP and most expensive.

Worker

The Worker is a low cost but weak unit that is used to create the Worker Bomb. With Low HP and Attack but great Speed and Cost, it can be useful for laying traps for enemies.

Worker Bomb

The Worker Bomb is a stationary unit that is created by the Worker. These do not cost Gil to create and have no HP but also have low Attack. Decent range and good all-round strength against most enemy units.

How to Battle

At the start of the battle, you are allowed to place your units above the battle line; this line is set around half way down the mountain side and moves along with your units as they go down the mountain.


On the left of the screen is a meter that shows the number of allied units at the top, the number of enemy units active at the bottom and a bar that shows the enemy progress up the mountain.


On the right is th battle speed bar that can be increased or decresed by using the L1 & R1 buttons (PG UP and PG DN on Keyboard).


You can select units with the D-Pad (Arrow Keys) and by pressing ◯ (OK) which brings up a menu in the top right, pressing ◯ (OK) again allows you to select a place to move the unit, an enemy to attack, an ally to repair or a place to build a bomb.

Victory conditions

Victory can be achieved in a couple of ways:

  • Defeat all enemies on the field - Enemies appear gradually and if you defeat all enemies on the field, the rest don't appear and you win the battle.
  • Defeat the Commander on the field - Once all enemies have arrived, the final one is the Commander. Defeat the Commander to win the battle.

If an enemy reaches the top, all is not lost. You will have to fight a Boss battle against CMD. Grand Horn but you will not get the reward for the battle.

Funding the Fort

The Fort starts out with 15,000 Gil; if you miss a battle, or if you ask them to handle the battle, they will spend 3000 Gil on the battle. If they have 3000 Gil, the battle will be a victory, if not it will be a loss.


You can increase the funds the Fort has by donating your Gil to them by talking to the lookout; the maximum amout of money they will hold is 30,000 Gil.


If you are planning to do all the battles (that you can), then you will need to fund them 3000 Gil to cover the battles that you can't do.

Strategy

The objective with this strategy is to prevent the enemy from getting too far up the mountain. To do this, deploy a fast unit (Attacker is the fastest unit) as close to the red line then start the battle.


As soon as battle begins, move the unit down the mountain as far as you think you can go. This moves the battle line to where the unit is and allows you to place your next units much lower than before.


Deploy your units carefully based on the units that appear; you can also deploy the stationary units to assist. The fastest way to complete a battle is to defeat all enemies on the screen; if you can do this quick enough, you won't have to fight a majority of enemies.


Battles

There are a total of 21 battles that the Fort has to endure. Of these, there are 15 that you can join and battle for them and 6 that the Fort must deal with themselves.


The reason there are 6 that the Fort has to deal with is they occur at times that you can not get to the Fort to fight for them; with the funding that the Fort starts with, they can defend against 5 of these but will lose the 6th one unless you donate 3000 Gil to them to cover the cost of it.


The 15 that you can do and spaced out and require you to come back to the fort at specific parts of the game to fight.

Battle Battle Level Reward Details
1 1 Magic Comb After leaving Mythril Mine and heading south the Fort Condor. Must be done before resting in Junon Harbour.
2 2 Peace Ring After resting in Junon Harbour but before talking to Pricilla to get the whistle.
3 2 Ether (3) After getting the whistle from Pricilla but before using Mr. Dolphin to get up the tower.
4 3 Megalixir After getting the buggy but before heading to Cosmo Canyon.
5 3 Hi-Potion (5) After selecting a party to enter the Cave of Gi but before completeing the cave. (Requires Buggy to not be broken)
Tip: Park the buggy a fair distance away from Cosmo Canyon and walk the rest of the way, then head back to it and head back to Fort Condor
6 3 Hi-Potion (5) After completing the Cave of Gi but before Rocket Town.
7 4 Superball After talking to Shera in Rocket town the first time, but before talking to her the second time (before Rufus arrives.)
8 4 Turbo Ether (3) After getting the Tiny Bronco but before getting the Keystone at Gold Saucer.
9 4 Turbo Ether (3) After the Date in Gold Saucer but before entering the Temple of the Ancients.
10 5 X-Potion (5) After the Temple of the Ancients but before the Sleeping Forest.
11 5 X-Potion (5) After awakening the Sleeping Forest but before sleeping in the Forgotten Capital.
12 5 X-Potion (5) After sleeping in the Forgotten Capital but before the Jenove-LIFE fight.
13 6 Elixir (3) After Jenova-LIFE but before Whirlwind Maze
14-18 These fights occur during the time when Cloud is missing and Tifa and Barret are going to be executed in Junon.
19 6 Elixir (3) After getting the Highwind but before Mideel
20 This fight occurs during Mideel while searching for Cloud.
Huge Materia 7 Huge Materia
Phoenix (Materia)
The only mandetory battle. With Cid as the party leader, head to Fort Condor to defeat Shinra again.
Even if you fail, defeating CMD.Grand Horn will still be seen as a victory.


Rewards

You can receive a reward for each battle that you win (A win counts as defeating the enemy on the battlefield and not allowing the enemy to reach the top). The rewards you can earn depends on the Battle Level and whether you have earned the special reward for the previous level; the special reward for each level are:

  1. Magic Comb
  2. Peace Ring
  3. Megalixir
  4. Superball


If you miss the special item, you can lock yourself out from receiving rewards for the battles. To avoid this, it is receommended to do all of the battles if you are planning to do this quest. (This does not include the battles that can not be fought).


CMD.Grand Horn

If you fail to stop the enemy from reaching the top then you must fight a normal battle against a Boss called CMD.Grand Horn. The stats of this Boss will change based on a few factors but it is not very strong.

Tips:


Boss can use Punch once or twice immediately after using Poison Breath.


Boss will use Grand Attack when defeated.

[Optional] Boss Fight: CMD. Grand Horn (Level: 19)

Statistics
HP MP Attack Mag
Attack
Def Mag
Def
Dex
2000 100 40 20 30 32 57
Elemental Affinity
Fire Ice Lightning
100% 100% 100%
Earh Poison Gravity
100% 100% 100%
Water Wind Holy
100% 100% 100%
Rewards
Items Gil EXP AP
Vagyrisk Claw (Consumable Item) 2400 200 20
Other Details
Morph Attacks Steal
None Grand Attack, Poison Breath, Punch None

Tips:


Boss can use Punch once or twice immediately after using Poison Breath.


Boss will use Grand Attack when defeated.

[Optional] Boss Fight: CMD. Grand Horn (Level: 25)

Statistics
HP MP Attack Mag
Attack
Def Mag
Def
Dex
4000 200 60 50 50 62 67
Elemental Affinity
Fire Ice Lightning
100% 100% 100%
Earh Poison Gravity
100% 100% 100%
Water Wind Holy
100% 100% 100%
Rewards
Items Gil EXP AP
None 4800 400 40
Other Details
Morph Attacks Steal
None Grand Attack, Poison Breath, Punch None

Tips:


Boss is fought if you lose the storyline Huge Materia battle.


Boss can use Punch once or twice immediately after using Poison Breath.


Boss will use Grand Attack when defeated.

[Optional] Boss Fight: CMD. Grand Horn (Level: 37)

Statistics
HP MP Attack Mag
Attack
Def Mag
Def
Dex
8000 300 100 95 70 80 79
Elemental Affinity
Fire Ice Lightning
100% 100% 100%
Earh Poison Gravity
100% 100% 100%
Water Wind Holy
100% 100% 100%
Rewards
Items Gil EXP AP
Imperial Guard (Armour)
Phoenix (Materia)*
9600 800 80
Other Details
Morph Attacks Steal
None Grand Attack, Poison Breath, Punch None

(*) Phoenix Materia is under the egg when it hatches.

Share by: